The Rodecaster Pro, 1 or 2, is an incredible piece of kit. Rode has enabled studio grade quality sound in almost any location. You can get the high-quality podcast sound you’re looking for using a Rode Podmic when you the our simple settings outlined in this tutorial below.
Find The PodMic Settings
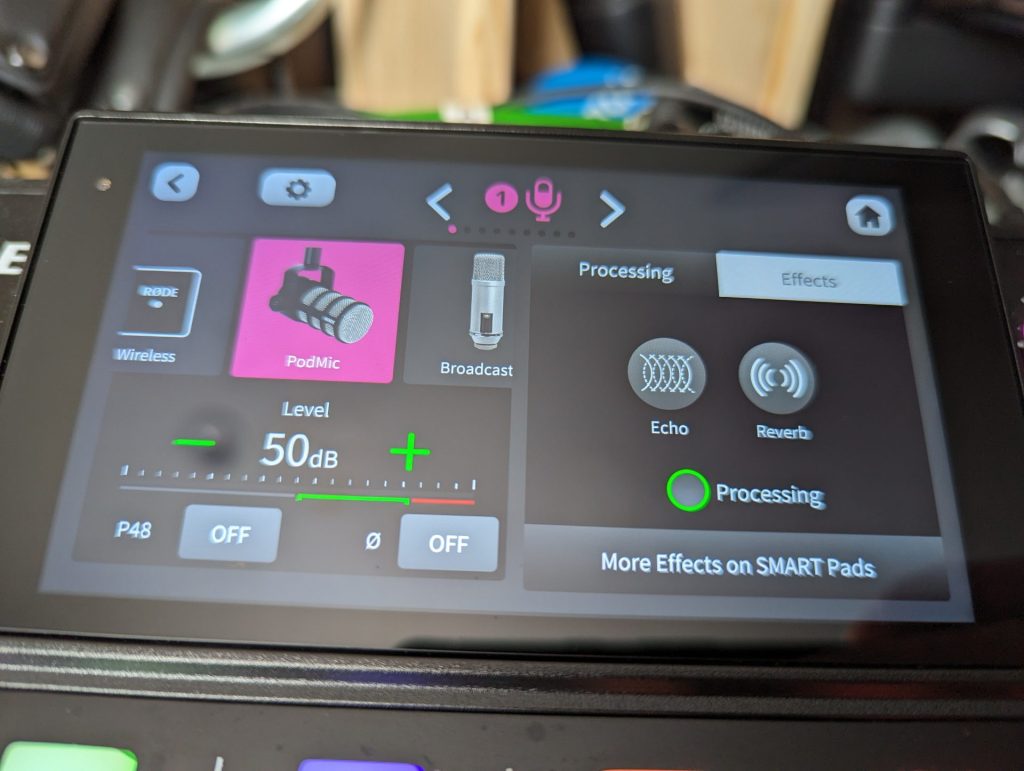
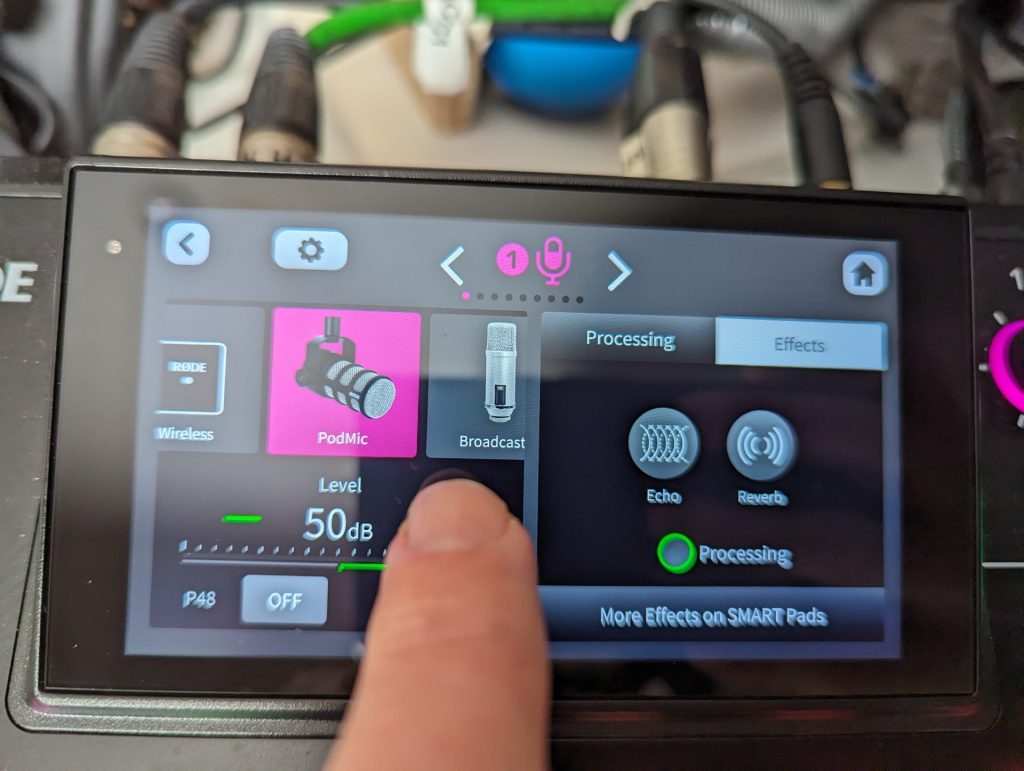
First, find the PODMIC setting in your menu. It couldn’t be easier with the touch screen. We’re naturally assuming you have everything connected via XLR cable here. Rode has set up existing settings in their menu for your microphone. You can choose SM7B, NT1, Procaster and more.
Press the coloured button for the mic you wish to set up. Find the PODMIC setting and press. You can select several settings called presets for your processing. Let’s first look at the volume of the microphone.
Adjusting Volume
You can see an option to increase volume. you can do this either on the touch screen with the + and – signs, or via the volume nob. Our advice is to test your microphone and voice level and adjust accordingly. Remember you don’t want to be too far away from the microphone, but not too close. A good way to set your distance is by touching the thumb on your nose, and your pink on the mic – stretch the hand palm open. That’s an approximate distance. It can differ for each person.
Your aim should be to hit the green indicator on the meter, if you hit the red you’re too loud.
Try the PODMIC settings
You can choose from multiple settings for your needs. Try the Presets button where you can select from Neutral, Podcast Studio, and Broadcast. You can also create and save your own set of settings.
Neutral enables you to create a good-sounding base-level sound. It will sound professional.
The Podcast Studio preset provides that podcast show host sound.
Broadcast mimics the sound of the radio, it adds more compression to the audio.
Try Processing
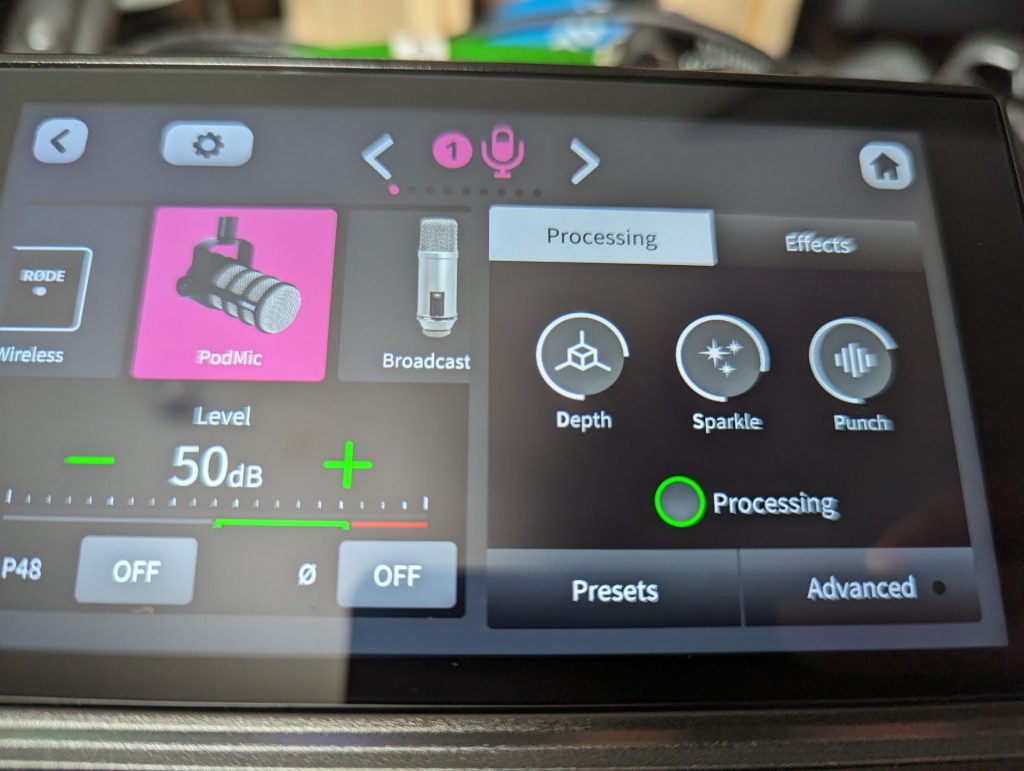
Next, let’s look at adding processing and effects to the audio to add extra depth to your voice.
The Rodecaster Pro’s PODMIC presets include Depth, Sparkle and Punch. They are essentially processing and EQ settings made easy – think of them as the mid, top and low end of your voice. Although they also add in some compression too.
Depth allows you to create and build extra mid-range into your voice by turning the setting up.
Sparkle can add more top-end and add crispness to your voice.
Punch helps add bass and some compression to your voice.
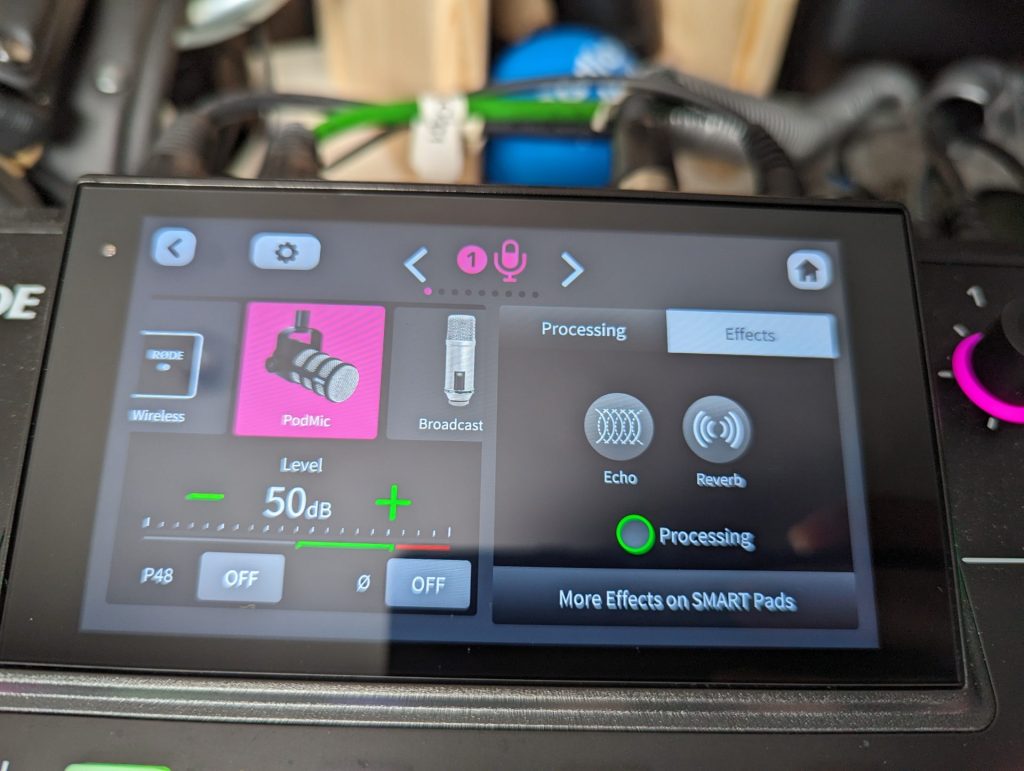
The effects preset can help you add room depth by utilising reverb and echo, the more you use the more it adds. less is more here.
In Conclusion
The Rode Podmic and Rodecaster Pro 2 are perfectly matched to work together to help you create a professional sound for your podcast. While these settings are great, you can go deeper into the advanced settings to set up the processing to work for your voice and recording surroundings. Read our tutorial about ‘advanced processing’ settings for the Rodecaster Pro 2 processing for any microphone to learn how to set your Rodecaster up for high-end professional sound. We show you how to set up the high pass filter, De-sser, Noise Gate, Compressor, equaliser and Exciter to take your microphone sound, and subsequent recordings to the next level.